
I couldn’t believe there was mist on my windshield this morning. If it had been any cooler, it would have been ice. The seasons are changing and fall is coming. It’s one of my favorite times of the year. And this time around I won’t be just experiencing the change of the weather but a new season at home. After being at home for the last seven years, I am about to enter back into the workforce (if you’ve been there, I welcome the advice and tips!) Thankfully, it’s part-time. I will be home during the day to write and spend time with Tori-Grace before heading into work in the evenings. With that said, I needed to come up with a few good recipes and tips to smooth out this transition and because we follow a plant-based, whole foods diet for our children’s dietary needs, I needed to be sure it wasn’t a headache for my family. Yep, I’m the new vegan on the the M.O.M. Team–more like Flexatarian because I still love to have sushi every once in a blue moon!

TIPS
Plan your menu.
I plan everything: breakfast, lunches, and dinners. This helps you and your hubby stay on the same page and allows you to cook ahead of time if needed. Nothing is more chaotic than arriving home after a busy day with kids running amuck, homework needing checked and asking the age old question, “What’s for dinner?”
Not only do I plan a menu, I write the menu out on a weekly board and include the recipe book and page number.
Cook on the weekend with your friends
If i’ts possible, gather a few of your girlfriends and have a cooking spree. The beauty of cooking with your friends is you can combine resources and cookseveral meals at once. When finished, you’ve filled up your cup of girlfriend time and your freezer is full of tasty goodness.
Make Dinner for Lunch
This reduces much of my stress and our grocery bill. And the best part–your kids learn to like dinner! Often I will cook a larger meal with notion of having left overs (sometimes if it’s a hit, there are NO leftovers). Then depending on what it is, I put the meal in a thermos to keep warm or add extra icepacks to keep the items fresh and cold. Last Friday, I packed quinoa and peas for my daughter’s lunch. 🙂
How about some recipes to help you plan ahead? These recipes are on my author site but I’m putting here on TheMomInititave for you to Pin or print!
- 3 tablespoons olive oil
- 2 teaspoons salt
- 2 teaspoons oregano
- 2 jars of your favorite marinara sauce
- 2 jars of marinated artichokes, chopped (optional)
- 2 packages (32) ounces extra firm tofu
- 2 cloves garlic
- 2 tablespoons nutritional yeast
- 1 large bag of frozen spinach, defrosted
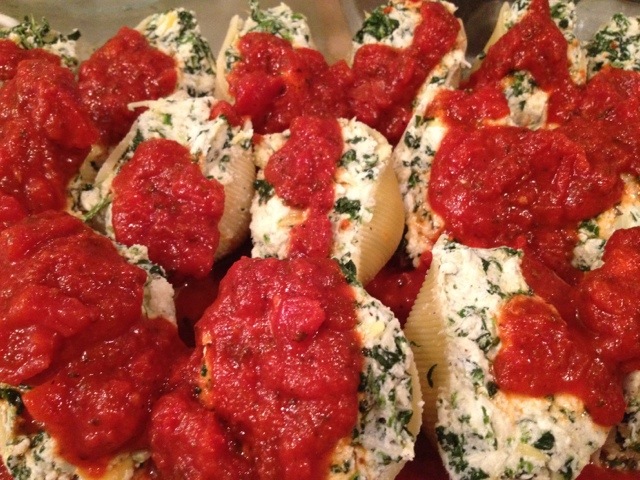
- 2 boxes jumbo shells
- Drain the tofu and pat dry with paper towels.
- Crumble into the bowl of a food processor or high-speed blender along with olive oil, salt, oregano, garlic and nutritional yeast. Process on high until smooth and “ricotta-like”.
- Add the defrosted spinach & artichokes to the blended tofu mixture.
- Cook shells in boiling salted water until el dente. Drain
- Preheat oven to 350 degrees. Pour about ½ cup pasta sauce into the bottom of a 9 x 13 inch pan. Stuff shells with 2 T of filling and place in pan, seam side down. Repeat until all shells have been stuffed.
- Pour remaining pasta sauce over shells, cover with foil and bake for 30 minutes. Serve!
- Place a thin layer of sauce in each pan. Fill each shell with 2-3 tablespoons filling. Place shells, filled side down, in pan, allowing 3 to 4 shells per serving. (Small loaf pan, 3 shells; 8-inch small casserole pan, 6-7 shells; 8 by 8 pan, 18-19 shells; 9 x 13 pan, entire recipe). Cover with remaining sauce.
- Cover each pan with foil and then wrap in plastic wrap or place in plastic bag and seal.
- To avoid confusion about what you have stored and to know what to do with it later, it is important that you label your container so the instructions are handy when you are ready to cook your meal. Cut out and/or copy the label and tape to outside of outer wrap. Lay pans flat in freezer. Remove plastic wrap before baking. Bake according to label directions.
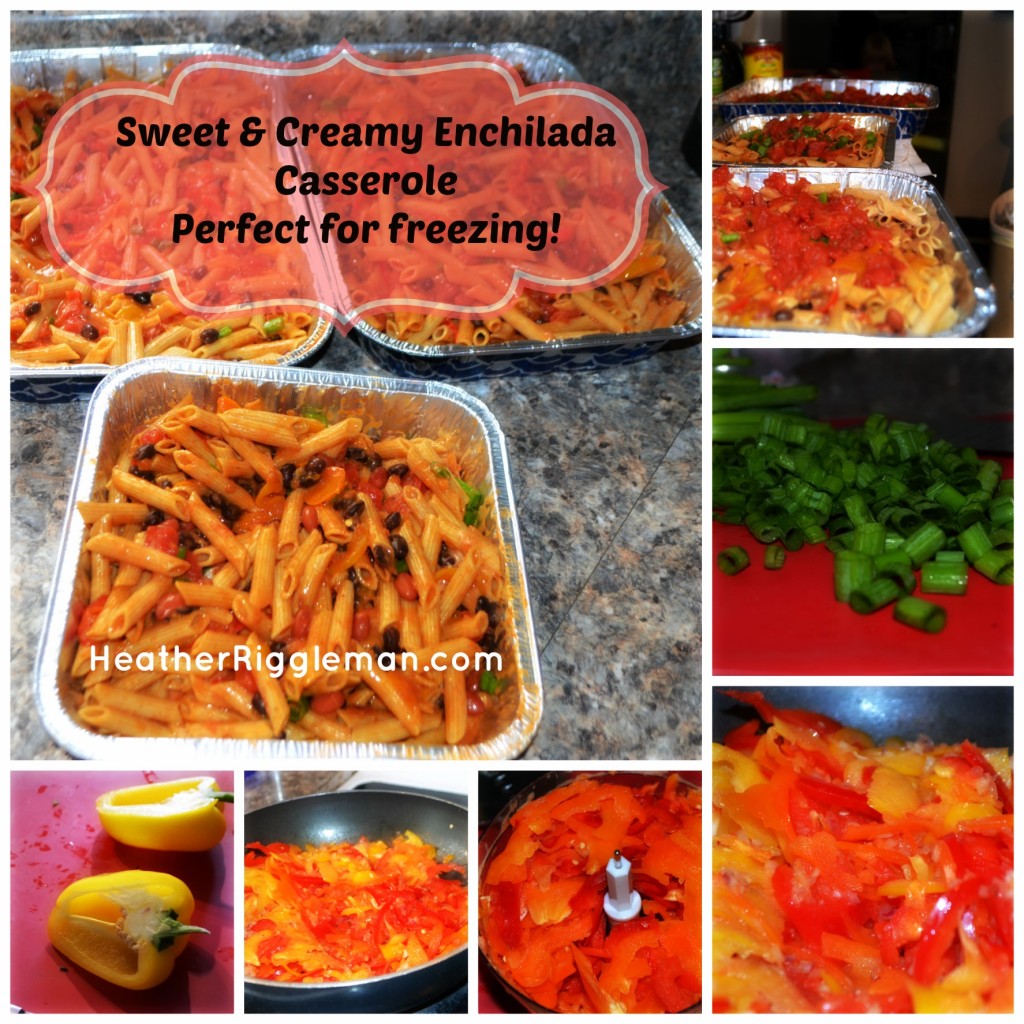
- 16 ounces of fusili pasta (any pasta will do if you ask me)
- 1 tsp olive oil
- 2 red onion, chopped
- 1 medium jalapeno pepper, seeded and chopped* (optional)
- 5 bell peppers chopped
- 2 to 4 tbsp taco seasoning mix to taste
- 2 can black beans (or 4 cups cooked), drained and rinsed
- 2 cups enchilada sauce (mild)
- 1.5 to 2 cups Vegan Alfredo Sauce (regular alfredo sauce is great too for those who can eat diary).
- 1/3 heaping cup raw cashews
- 2 garlic cloves
- 3 tbsp nutritional yeast
- 3/4 cup almond milk
- 1 tbsp lemon juice
- 2 tbsp non-dairy butter (I used Soy-free Earth Balance)
- 2 tsp organic Tamari soy sauce, or to taste
- 2 tsp Dijon mustard
- 1 tbsp Tahini (sesame seed paste)
- Pinch of nutmeg
- Kosher salt, to taste
- 1/2 tsp Paprika, to taste
- Freshly ground black pepper, to taste
- Add all ingredients except pasta into a blender and blend until smooth.
- 1 c. coconut milk [the canned kind]
- 1/2 c. nutritional yeast
- 1 medium clove of garlic
- 1 tsp. dried basil
- 1 tsp. sea salt
- 1/2 tsp. fresh ground black pepper
- 1. Preheat oven to 350F and grab a 9 by 13 casserole dish
- 2. Bring a pot of water to boiling, toss in some salt and cook pasta until Al Dente
- 3. In a large skillet, sauté the chopped onion, jalapeno, and peppers in the olive oil over medium heat for about 7-8 mins.
- 4. Combine alfredo sauce and enchilada sauce in a bowl and set aside.
- 5. Add the taco seasoning, drained and rinsed black beans, and 1 cup of sauce. Stir well and cook for another 5 mins.
- 6. Stir in pasta and chopped green onion. Season with salt and pepper to taste and adjust seasonings if necessary.
- 7. Spread 1/2 cup of enchilada sauce over the bottom of the casserole dish. Scoop out the skillet mixture and spread evenly in dish. Spoon on the rest of the sauce on top.
- 8. Bake for 15-20 mins at 350F until heated through.
- Serve with shredded Daiya cheese (or other non-dairy cheese) and tortillas or chips.
- Perfect to freeze. Simply follow instructions up until baking. Place food in a freezer safe container and freeze!

- Zest of one orange
- 1/4 Cup Orange Juice
- 1/4 Cup Agave Nector
- 1/2 Cup Water
- 1/2 Cup warm water
- 1 Tsp granulated sugar
- 2 1/2 Tsp Double Acting Yeast
- 3 3/4 Cup Whole Wheat Flour (If you prefer not to use whole wheat as it tends to be dense, consider mixing in 1 1/2 cups of whole wheat flour to unbleached all purpose flour).
- 4 Tablespoons Butter (Earth Balance)
- 2 Teaspoons Cinnomon
- 1/4 Cup Brown Sugar
- 2 Cups Powdered Sugar
- 3 Tablespoons Orange Juice
- In a large cup, whisk together agave, water, orange juice and zest, set aside.
- In your mixing bowl, add warm water and yeast and sugar. Allow the yeast to sit until it foams. Then add all liquid ingredients. Begin adding flour and salt, mixing until a soft ball of dough forms. Turn out onto counter and knead up to 8 minutes.
- If ball is still too sticky, add more flour as needed.
- Roll into a ball and place in a greased bowl, allowing dough to rise for about 1 hour or until doubled in size (Often, I will turn on the oven for about 5 minutes to warm my kitchen, opening the door).
- Once dough as risen, transfer onto counter and roll into a rectangle (16 X 12). Brush on melted butter, sprinkle on cinnomon and brown sugar. Leave filling 1 inch from edges.
- Begin rolling dough to form a spiral with the long edge (it will look like a jelly log). Try to make it as tight as possible and pinch the edges to form a seam.
- Using a sharp knife or bench scraper, cut dough evenly into 12 pieces and transfer into a greased 9 by 13 baking dish (I use coconut oil or olive oil).
- Cover with a cloth or plastic wrap and allow rolls to rise again for about 30 minutes until almost doubled. Once doubled in size, place in oven @ 350 degrees for 30 to 35 minutes.
- Whisk orange juice and sugar and drizzle over cinnomon rolls and serve. (If you have a healthier version, tell me about it!).
- Follow directions up to the point where rolls are ready to be baked.
- At this point, the cinnamon rolls can be covered with plastic wrap and refrigerated overnight (I've actually made them two days in advance) or frozen for one (1) month. Before baking, allow rolls to thaw completely and rise in a warm place if frozen. I have found that I have to take the unbaked frozen cinnamon rolls out of the freezer 10 to 12 hours before planning to bake. I just put the frozen cinnamon rolls (container and rolls) on my counter (not in the refrigerator) overnight for 10 to 12 hours.
- If refrigerated, they can be either baked upon removing from the refrigerator or let come to a room temperature (I've done both ways). They do a slow rise overnight and it is not necessary to let them come to room temperature before baking. If you rolls are not rising enough after being refrigerated, your yeast may need to be tested. To overcome this, let them rise, while sitting on the counter, until you achieve the desired rising before baking.
IF YOU LIKE THIS POST, OR IF IT HAS ENCOURAGED YOU, PLEASE SHARE
JOIN US ON FACEBOOK and TWITTER too!
SUBSCRIBE to receive your FREE copy of Overwhelmed today!
AND/OR
SIGN UP to BEGIN a M.O.M. Initiative Mentor Group in your area! You will also receive a FREE copy of Overwhelmed and as a ministry tool, please feel free to make as many copies as you need.
- Ch…ch…ch…CHANGES Are Coming in 2017 for TMI - December 27, 2016
- What New Thing Are You Ready to See God Do in Your Life in 2017? - December 26, 2016
- Heaviness and Newness - December 23, 2016

